Looking at your favorite outdoor bench cushion and think, "When did you become so... tragic?" Whether it's sun-bleached fabric that screams "I've seen better days" or mysterious stains that could probably tell stories (but honestly, we don't want to know), reupholstering cushions is like giving your furniture a glow-up it desperately needs.
The good news? You don't need to be the next HGTV star to pull this off. With some basic tools, a bit of patience, and maybe a coffee (or three), you can transform those sad cushions into Instagram-worthy pieces that'll make your neighbors wonder if you hired a decorator.
Why Reupholster Instead of Replace
Plot twist: Sometimes the cushion foam is perfectly fine, but the fabric looks like it survived an apocalypse. Reupholstering is often way cheaper than buying new cushions, plus you get to flex your DIY skills without breaking the bank.
💰 Save Money
Reupholstering costs 60-70% less than buying new quality outdoor cushions
🌍 Eco-Friendly
Keep perfectly good foam out of landfills while reducing waste
🎨 Custom Style
Choose any fabric pattern that matches your vibe perfectly
What You'll Need for This Adventure
Before we dive in, let's gather our weapons of choice. Think of this as your reupholstering starter pack:

Essential Tools
- ✂️ Sharp fabric scissors (dull ones will make you question your life choices)
- 📏 Measuring tape
- 📌 Pins (lots of them – they have a habit of disappearing)
- 🧵 Heavy-duty thread
- 🪡 Sewing machine or needle for hand-sewing warriors
- 🔧 Seam ripper (your new best friend)
- ✏️ Fabric chalk or washable marker
Materials Shopping List
| Item | Quantity Needed | Pro Tips |
|---|---|---|
| Outdoor Fabric | 2-3 yards per cushion | Go for solution-dyed acrylic – it laughs at UV rays |
| Zipper | Length of cushion + 4 inches | Heavy-duty outdoor zippers are worth the extra cost |
| Piping Cord | Perimeter x 2 | Optional but makes everything look fancy |
| Extra Thread | 2-3 spools | Always buy more than you think you need |
Choosing the Right Fabric Like a Boss
Here's where things get spicy. Not all fabrics are created equal, especially when it comes to outdoor cushions that need to survive everything Mother Nature throws at them.
Outdoor Fabric Superstars
Solution-Dyed Acrylic
The MVP of outdoor fabrics. UV-resistant, water-repellent, and comes in colors that won't fade faster than your summer tan.
Polyester Blends
Budget-friendly option that still packs a punch. Good durability but might need more TLC over time.
Vinyl/PVC
Waterproof champion but can get sticky in hot weather. Great for pool areas, not so much for snuggling.

⚠️ Fabric Faux Pas to Avoid: Cotton might look pretty, but it's basically a sponge that fades. Indoor fabrics outdoors? That's a hard no. They'll deteriorate faster than ice cream in August.
Step-by-Step Reupholstering Magic
Alright, let's get our hands dirty (metaphorically – keep those fabrics clean!).
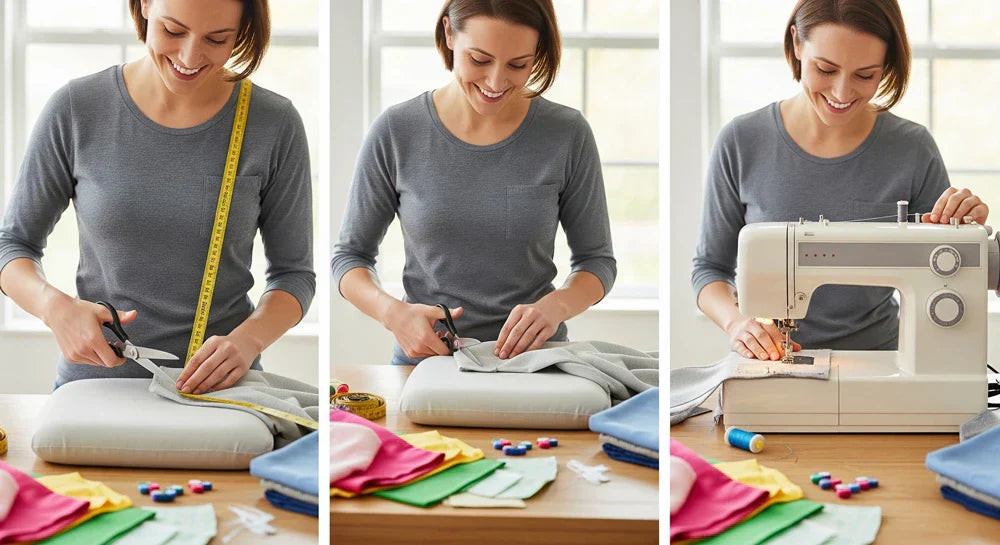
Step 1: Deconstruction Time
First things first – we need to carefully dismantle the old cover. Think of yourself as a fabric archaeologist. Use your seam ripper to gently remove stitches, and please take photos as you go. Trust me, future you will thank present you when you're trying to remember how all these pieces fit together.
Pro hack: Label each piece with masking tape as you remove it. "Top panel," "side panel," "that weird triangular thing" – whatever works for your brain.

Step 2: Pattern Making (AKA Playing Fabric Tetris)
Use your old pieces as templates – they're like a roadmap to cushion success. Lay them on your new fabric and trace around them, adding about ½ inch seam allowance all around. This is where that fabric chalk comes in handy.
🎯 Cutting Tip: Pay attention to fabric direction! Stripes and patterns need to line up, or your cushion will look like it's having an identity crisis.
Step 3: Sewing Like You Mean It
Start by sewing the zipper into one of the back panels – this is your cushion's escape hatch for future cleaning or foam replacement. Then work your way around, sewing panels together with strong, straight stitches.
If you're adding piping (and you should, because it makes everything look professional), sew it to the top and bottom panels first, then attach everything else.
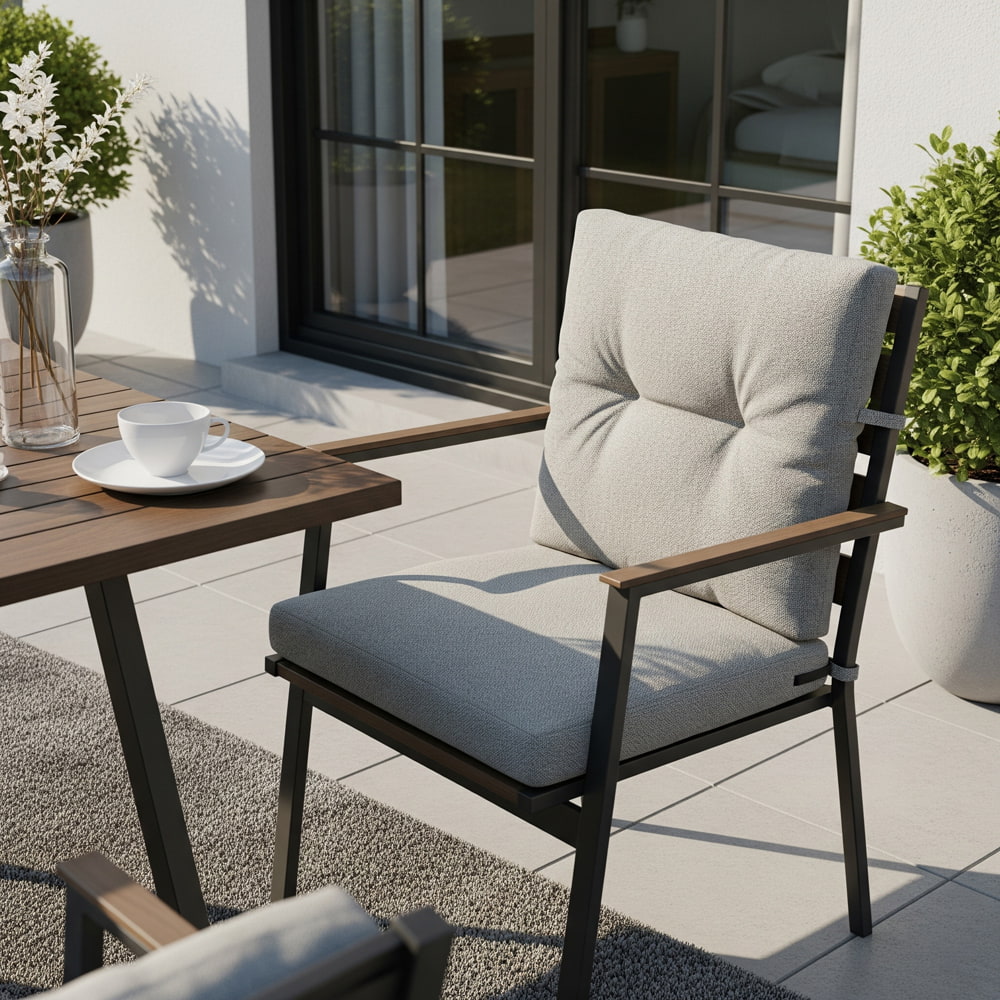
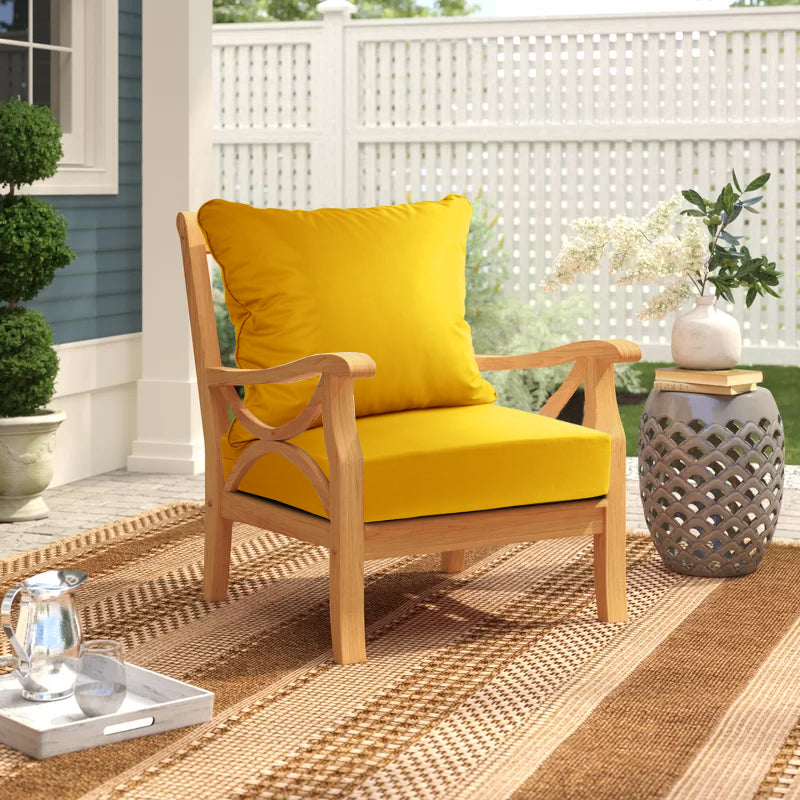
Upgrade Your Outdoor Space with Rulaer

While DIY reupholstering is totally doable, sometimes you just want to skip the hassle and get straight to the relaxing part. Our Rulaer Outdoor Bench Cushion collection features premium solution-dyed acrylic fabrics that laugh in the face of UV rays and weather extremes.
Each cushion comes with reinforced stitching, water-resistant zippers, and foam that maintains its shape season after season. Plus, our patterns are designed by people who actually understand that your outdoor space should look as good as your living room.
Shop Rulaer CushionsStep 4: The Final Assembly
Turn your cover right-side out through the zipper opening (satisfying moment alert!), then carefully insert your cushion foam. This might require some gentle coaxing and possibly questioning your measuring skills, but it'll fit.
Zip it up, fluff it up, and step back to admire your handiwork. You've officially leveled up in the DIY game!

Troubleshooting Common Disasters
Let's be honest – not everything goes according to plan. Here are the most common "oops" moments and how to fix them without crying:
😱 "My cushion looks like a burrito"
Solution: You probably cut your pieces too small. Add fabric strips to extend the sides, or embrace the snug look and call it "fitted style."
🤦♀️ "The zipper is fighting me"
Solution: Take a deep breath. Baste the zipper in place first, then sew slowly. Forcing it will only lead to puckered fabric and regret.
😵 "Everything is crooked"
Solution: This usually happens when you don't pin enough. Pin like your life depends on it, then pin some more.
Making Your Reupholstered Cushions Last
You've put in the work – now let's make sure your creation doesn't become next season's reupholstering project.
🧼 Regular Cleaning
Hose them down monthly and spot-clean spills immediately. Most outdoor fabrics can handle a gentle machine wash too.
☂️ Weather Protection
Even weather-resistant cushions appreciate some TLC. Store them during harsh storms or invest in furniture covers.
🔄 Rotation Station
Flip and rotate your cushions regularly to ensure even wear and sun exposure. It's like crop rotation, but for furniture.
When DIY Meets Reality Check
Look, we're all for the DIY life, but sometimes you need to know when to fold 'em. If you're staring at a pile of fabric pieces wondering if you accidentally created abstract art instead of a cushion cover, it might be time to call in the professionals – or consider upgrading to cushions that are already perfect.
DIY vs. Professional vs. New Cushions
| Factor | DIY Reupholster | Professional Service | New Quality Cushions |
|---|---|---|---|
| Cost | $20-40 per cushion | $50-80 per cushion | $60-150 per cushion |
| Time Investment | 4-6 hours | 1 week turnaround | 2-day shipping |
| Skill Required | Moderate | None | None |
| Satisfaction Level | High (if successful) | Medium | High |
Your Cushion Makeover Success Story
Congratulations! You've either successfully reupholstered your cushions or gained enough knowledge to make an informed decision about your next move. Either way, you're winning.
Remember, the goal isn't perfection – it's transformation. Your outdoor space deserves furniture that makes you smile every time you step outside. Whether you DIY it, hire a pro, or invest in new quality pieces like our Rulaer collection, the important thing is creating a space where you actually want to spend time.
Ready to Transform Your Outdoor Space?
If reupholstering sounds like more adventure than you signed up for, check out our curated collection of outdoor bench cushions. Each piece is crafted with premium materials and designed to withstand whatever your outdoor lifestyle throws at them.
 Explore Rulaer Collection
Now go forth and make your outdoor space the envy of the neighborhood. Your perfectly cushioned bench is waiting!

2 comments
Rulaer Team
@Marie Monaco That sounds really exhausting — especially with a cushion that size and shape. Your new approach makes sense, and I hope this version finally goes on smoothly. Thanks for sharing your experience.
Marie Monaco
My cushion is 5 in. thick, 4 ft on one side, 5 1/2 ft. on oposite side, and 3 foot sides, After many attempts to copy the former cover, with zipper on the 4 ft side, It was impossible to get the cover onto the cushion. I have decided on a new design. I will cut a piece of fabric to cover the two large sides. Then I’ll cut a piece to fit around the edge, then fasten it all together with corkscrew upholstery tacks (lots of them), then secure the edges with strong nylon hand-stitches. This has been an exhausting process. Hope this works.
Leave a comment
All comments are moderated before being published.
This site is protected by hCaptcha and the hCaptcha Privacy Policy and Terms of Service apply.